CSSとJavascriptによる擬似フレーム(左メニュー)
こんにちは、ナカエです。
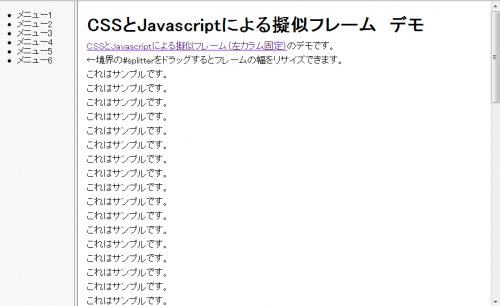
前回に引き続いて、今日はCSSとJavascriptを使ったフレームもどきの紹介です。
デモはこちら
フレームのリサイズに利用するスプリッターを含め、ネガティブマージンを使った3段組になります。
※リサイズ機能がいらない場合は単純な二段組で済みますね
他にもpositon:fixedを使う方法やdisplay:table-cellを使う方法(IE8以降)があります。
最後にリサイズ用のJavascriptです。
※動作決め打ちで書いているので応用はあまり効きませんがあしからず。そのうち書き直したいと思います。
前回に引き続いて、今日はCSSとJavascriptを使ったフレームもどきの紹介です。
デモはこちら
フレームのリサイズに利用するスプリッターを含め、ネガティブマージンを使った3段組になります。
※リサイズ機能がいらない場合は単純な二段組で済みますね
html (index.html)
<!DOCTYPE html>
<html lang="ja">
  <head>
    <meta charset="UTF-8" >
    <title>CSS + Javascript 擬似フレーム 左カラム固定</title>
    <link rel="stylesheet" href="./style.css" />
    <script type="text/javascript" src="./Splitter.js"></script>
    <script type="text/javascript">
      window.onload = function() {
        var spltr = new Splitter('splitter', 'left', 'right');
      }
    </script>
  </head>
  <body>
    <div id="left">
       メニュー
    </div>
    <div id="splitter"></div>
    <div id="right">
       コンテンツ
    </div>
  </body>
</html>
css (style.css)
*{
  padding : 0;
  margin : 0;
  box-sizing: border-box; /*paddingの計算が面倒なのでボーダーボックスモデルで*/
  -moz-box-sizing :border-box;
}

html,body {
  height: 100%;
}

#left {
  float: left;
  width:200px; /*左フレームの幅*/
  height: 100%;
  margin-right: -200px; /*左フレームの幅と同じネガティブマージン*/
  overflow: auto;
}

#splitter {
  float: left;
  width:6px; /*スプリッターの幅*/
  height:100%;
  margin-left: 200px; /*左フレームの幅と同じサイズ*/
  margin-right: -6px; /*スプリッター自身の分のネガティブマージン*/

  /*フレームに似た装飾*/
  background-color: #ccc;
  border: solid 1px #999;
  border-width: 0 1px;
  border-right-color: #666;
}

#splitter:hover {
  cursor:e-resize;
  background-color: #eee;
}

#right {
  height: 100%;
  margin-left: 206px; /*左フレームの幅 + スプリッターの幅*/
  overflow: auto;
}
他にもpositon:fixedを使う方法やdisplay:table-cellを使う方法(IE8以降)があります。
最後にリサイズ用のJavascriptです。
Javascript(Splitter.js)
var Splitter = function(splitterID, leftID, rightID){
  this.flag = false; //マウス押下中かどうかのフラグ
  this.elm = document.getElementById(splitterID); //スプリッター
  this.leftElm = document.getElementById(leftID); //左フレーム
  this.leftElmMinWidth = 0; //左フレームの最小幅
  this.leftElmMaxWidth = 1200; //左フレームの最大幅
  this.rightElm = document.getElementById(rightID); //右フレーム
  this.width = this.elm.offsetWidth;
  this.init();
}

Splitter.prototype = {
  //初期処理 ドラッグ時のイベントを設定
  init : function() {
    var self = this;
    this.elm.onmousedown = function(e){self.dragStart(e);};
    document.onmouseup = function(){self.dragEnd();};
  },

  //ドラッグ開始時の処理
  dragStart : function(e) {
    if(e) {
      e.preventDefault();
    }
    var self = this;
    document.body.style.cursor = 'e-resize';
    this.flag = true;
    document.onmousemove = function(e){self.dragProc(e);};
    return;
  },

  //ドラッグ終了時の処理
  dragEnd : function() {
    if(!this.flag) return;
    document.body.style.cursor = 'default';
    this.flag = false;
    document.onmousemove = null;
    return;
  },

  //ドラッグ中の処理
  dragProc : function (e){
    if(!this.flag) return
    if(e) {
      e.preventDefault();
    }
    var self = this;
    newWidth = this.getNewWidth(self.getMousePosition(e));
    this.leftElm.style.width = newWidth + 'px';
    this.leftElm.style.marginRight = (-1 * newWidth) + 'px';
    this.elm.style.marginLeft = newWidth + 'px';
    this.rightElm.style.marginLeft = newWidth + this.width + 'px';
    return false;
  },

  //マウスカーソルの位置から左フレームの幅を計算
  getNewWidth: function(newPos){
      newWidth = newPos.x - this.leftElm.offsetLeft - Math.floor(this.width/2);
      if(newWidth < this.leftElmMinWidth){
        return this.leftElmMinWidth;
      } else if(newWidth > this.leftElmMaxWidth){
        return this.leftElmMaxWidth;
      } else {
        return newWidth;
      }
  },

  //マウスカーソルの位置取得
  getMousePosition : function (e) {
    if(e) {
      pos = {
        x : e.pageX,
        y : e.pageY
      };
    } else {
      pos = {
        x : event.x + document.body.scrollLeft,
        y : event.y + document.body.scrollTop
      }
    }
    return pos;
  }
}
※動作決め打ちで書いているので応用はあまり効きませんがあしからず。そのうち書き直したいと思います。
- HTML , CSS , Javascript , Webデザイン